Appearance
Control Panel
Settings
Here you can save the common settings.
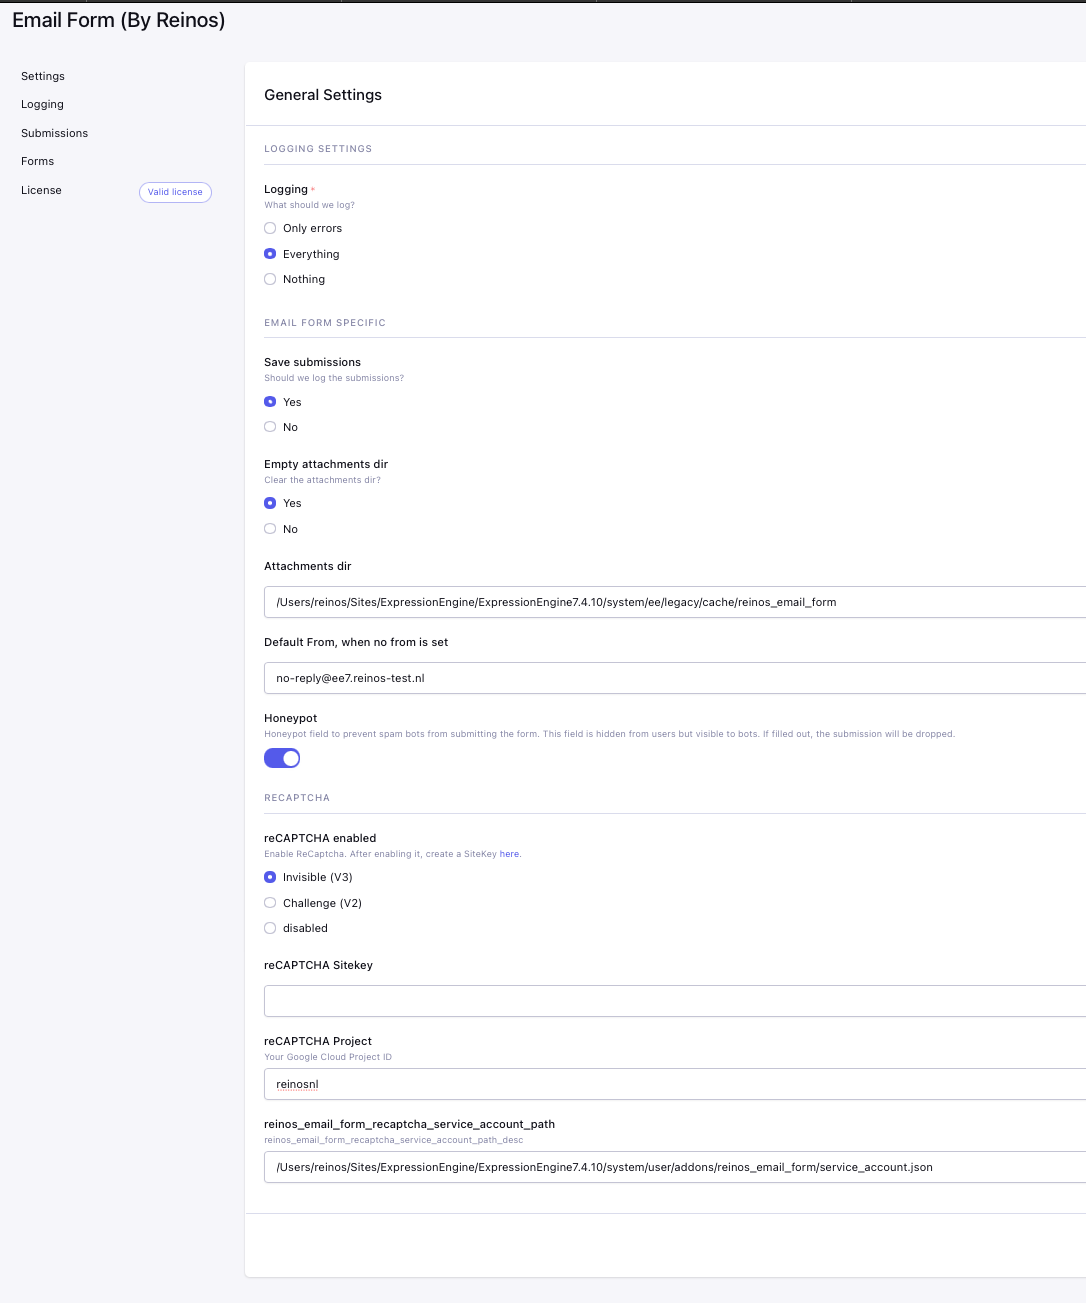
Logging
Enable logging
Save submission
Option that will save the submissions
Empty attachments dir
Clear the attachment dir. If enabled we only send the attachement per email, but it will not be saved in the submission in the DB.
Attachments dir
Set the dir where we save the attachements. Normally the default is fine.
Default From
Set a default from, when no from is set in the form tag.
Honeypot
Honeypot field to prevent spam bots from submitting the form. This field is hidden from users but visible to bots. If filled out, the submission will be dropped.
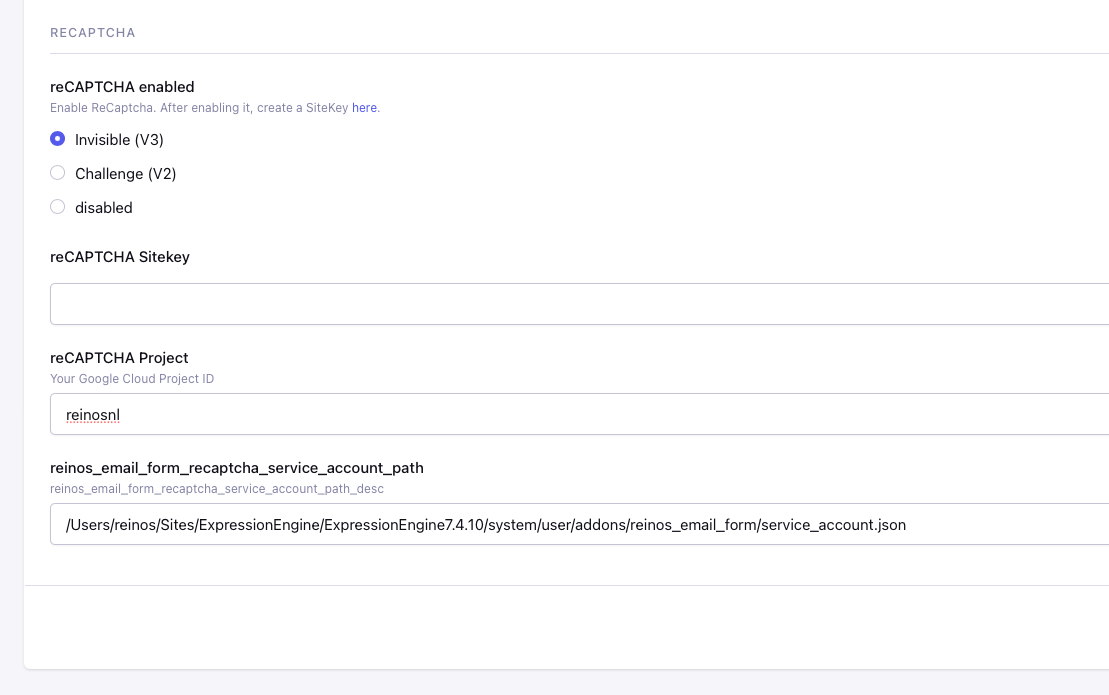
Google reCAPTCHA
Enable Google reCAPTCHA. You can choose either Challenge (legacy V2) or Invisible (legacy V3).
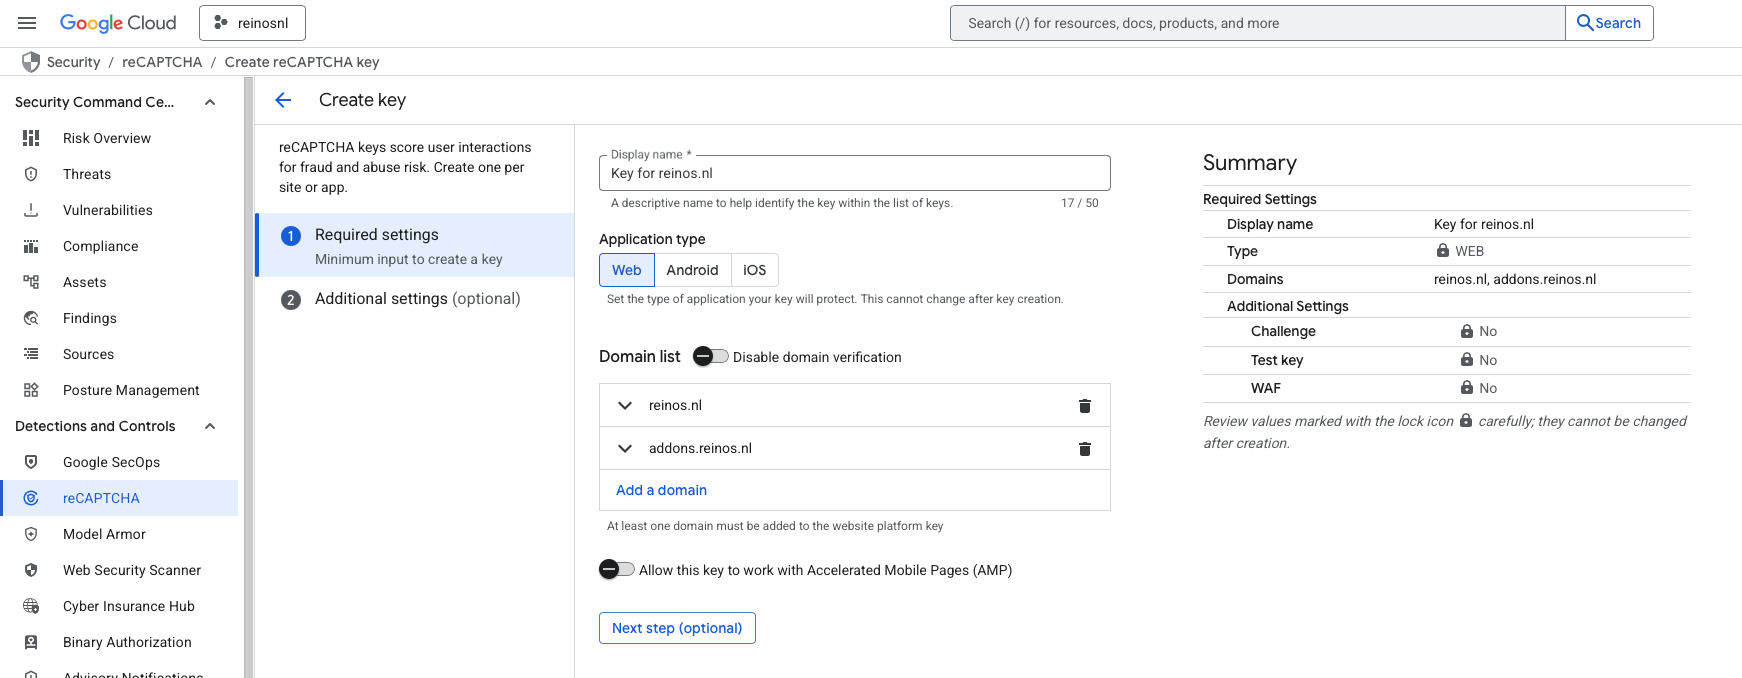
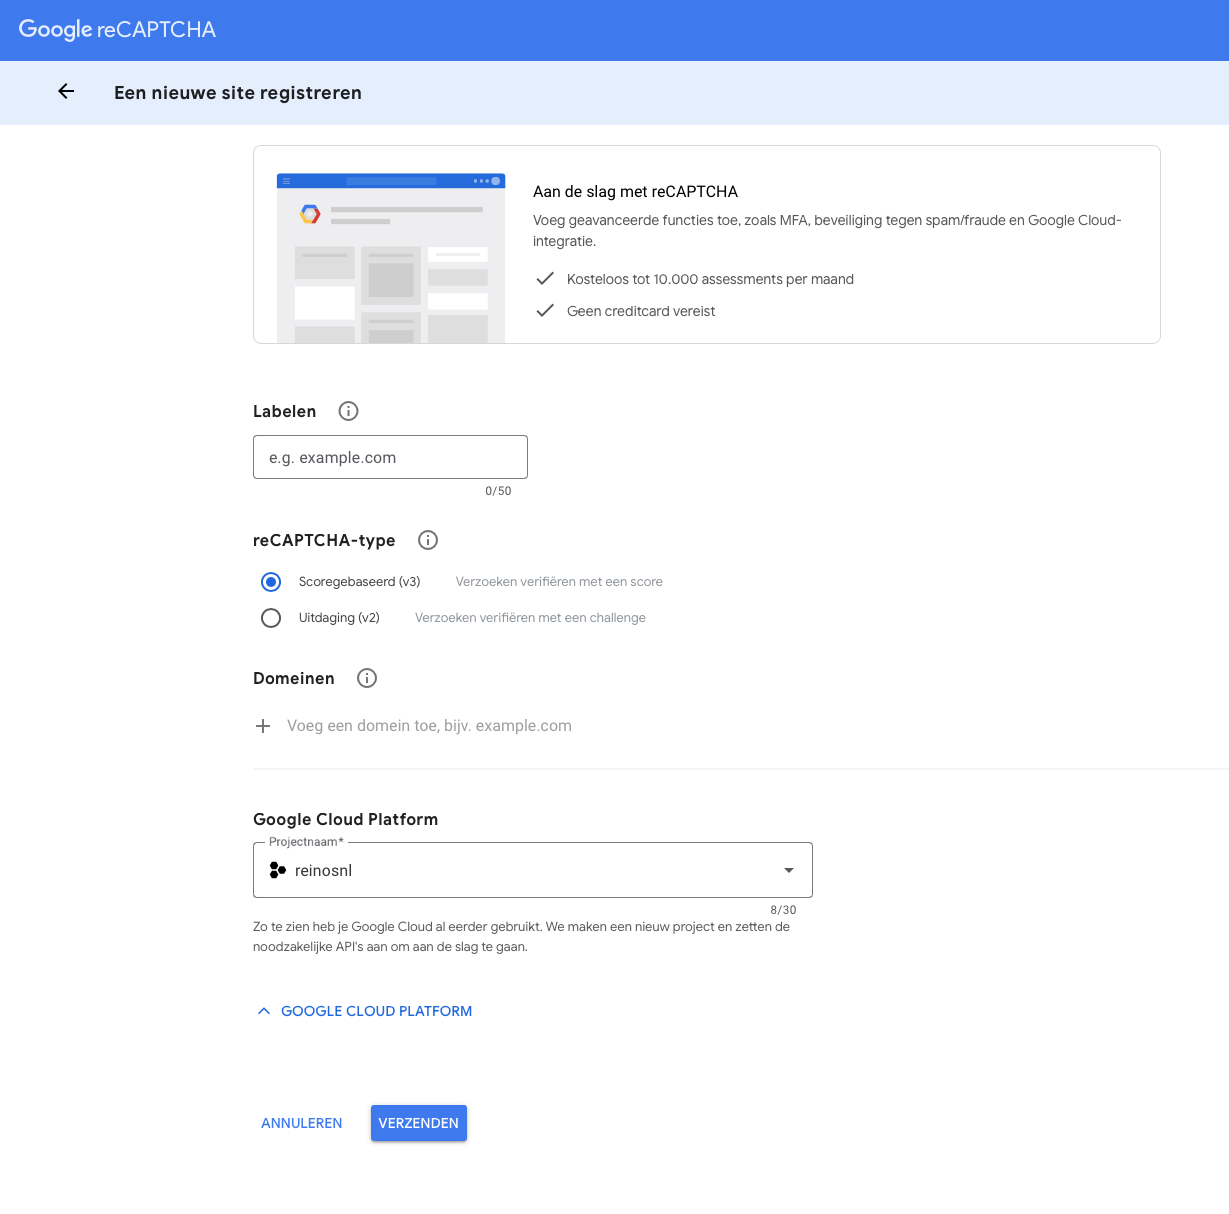
Create a new reCAPTCHA
To create a new reCAPTCHA, you need a Google account and access to Google Cloud.
Once logged in, go to the reCAPTCHA Cloud page and create a new key.
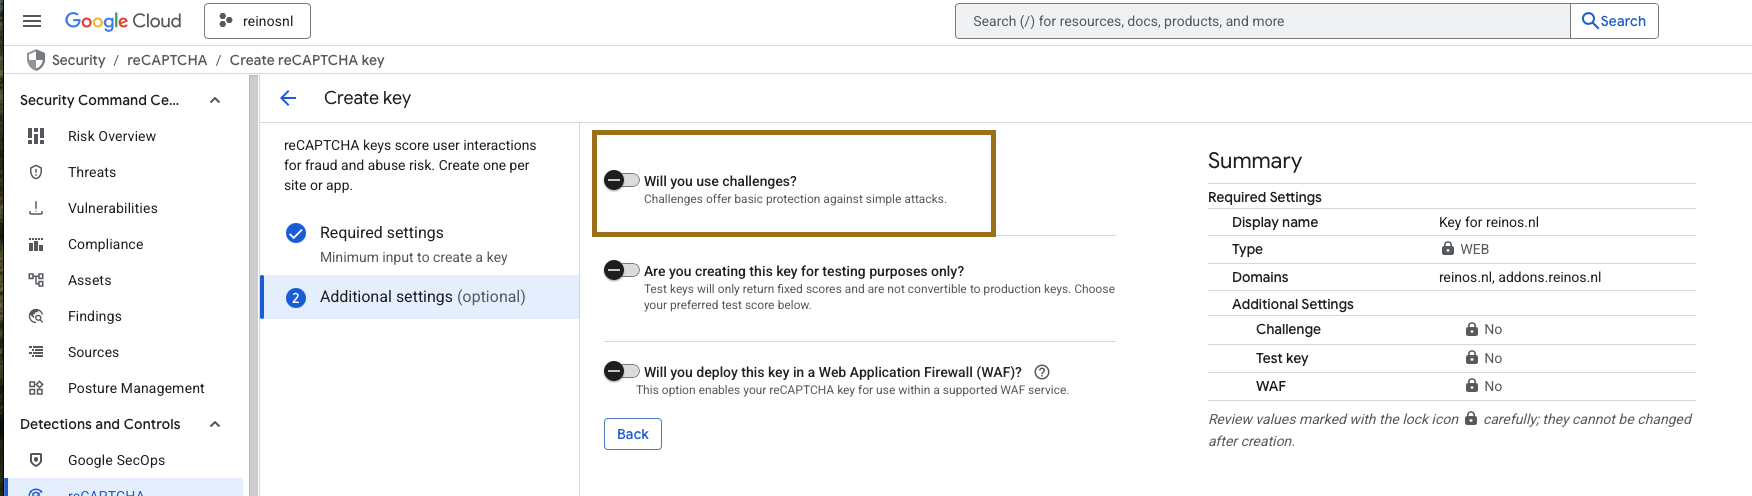
Next, proceed to the "Next step (optional)" section, where you can define whether the reCAPTCHA should be invisible or visible as a challenge.
If you want an Invisible or Challenge reCAPTCHA, you can configure this by setting the value for "Will you use challenges?" accordingly.
Once everything is filled out, click Create Key.
Create a service account
To authenticate with Google, the new reCAPTCHA uses the default authentication method via a service_account.json file. You can create and download one by following these steps:
- Navigate to console.cloud.google.com/iam-admin/serviceaccounts and select your project.
- Click the Create service account button.
- Fill in the details and ensure the account has sufficient permissions.
- After creating the account, go to its details page.
- Navigate to the Keys tab.
- Click Add key, choose Create key, select JSON as the key type, and click Create.
- A JSON file will be downloaded automatically. This file is needed for the authentication. Rename the file to
service_account.jsonand store it on a save place on you server. - Update the
Google Cloud Service Account Pathsetting to reflect the location where you put yourservice_account.json
Update the Email Form reCAPTCHA settings
Once you have your service account and the service_account.json file, go to your ExpressionEngine Email Form control panel.
Fill in all required fields. Make sure to select the same reCAPTCHA type (Invisible or Challenge) that you chose earlier when creating the reCAPTCHA key.
Also, ensure the service_account.json file is uploaded securely—ideally outside the web root—and update the file path accordingly.
More info about ReCaptcha can be found in the blog here
Google reCAPTCHA (legacy)
Beside the newly Cloud reCAPTCHA, we still have support for the old V2 and V3 reCAPTCHA. Simply select the V3 Legacy (Invisible) or V2 Legacy (Challenge) and enter your site key and secret.
Create legacy keys
Navigate to https://www.google.com/recaptcha/admin and click on the plus sign. Enter all the detail for your site and copy over the keys.
Submissions
Submissions are saved by default. Here you can manage and explorer them.
Forms
Forms added directly in your code can also be saved and managed in the control panel. This feature simplifies the process of editing forms once your site is live.
For example, when your code is version-controlled in Git, deploying minor changes to a form template can become unnecessarily complex. By saving your forms in the control panel, you can make quick edits directly from the interface without touching the codebase.
To display a saved form in your templates, you can use the following tag: {exp:reinos_email_form:get_form name='your_form_name'}
This approach offers both flexibility during development and convenience for ongoing maintenance.